
Let’s add a data item to the Workflow App.
This section explains how to set data items, such as data types that are frequently used in Workflow Apps, initial values, and editability settings.
This section also explains input form settings, such as sorting and positioning.
Duplicate the app we created to build a Business Trip Application App
As a practical exercise while learning about the data item format, we will create a business trip application app that is a modification of the app created in the previous chapter to make it more practical. So, let’s duplicate the app created in the previous chapter and modify it.
- Click [App Settings] > Workflow App Created in the Previous Chapter > [Copy as New App] to duplicate the app created in the previous chapter
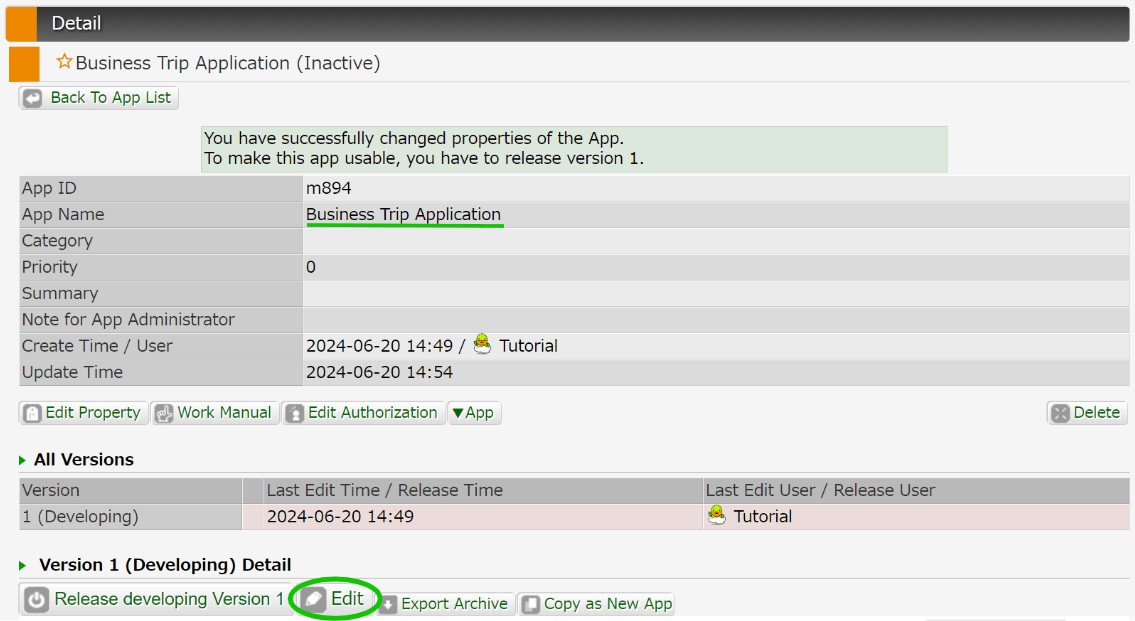
- Click [Edit Property] on the details screen of the duplicated app
- Edit [App Name] to an appropriate name such as “Business Trip Application”
- Click the [Edit] button to open the modeller
Adding Data Items
Once the modeller is open, start editing the data items. Let’s create an appropriate input form for a business trip application app.
Open the Data Items tab. There are already [String (multiple lines)], [Number], and [Date (Y/M/D)], but let’s add another [Date (Y/M/D)] (this will be the second one) and a [User]. Then edit the name of each item as follows. Edit the field name as well.
| Data Type | Item Name | Field Name※ |
| String (multiple lines) | Details | q_details |
| Numeric | Amount | q_price |
| Date (Y/M/D) | Start Date | q_date_start |
| Date (Y/M/D) | End Date | q_date_end |
| User | Applicant | q_applicant |
※ Field names must begin with “q_” and be 64 characters or less. Only letters, numbers, and underscores can be used.


If it looks like this, then it’s OK. You can also add data items using the Bulk Add Data Items feature, but we won’t explain that here.
Data Item Settings
Next, set the data editing permission. As explained in Chapter 5, each data item can have different edit permissions set for each Human Task, such as being able to write to the Title data in the Application task, but only being able to view it in the Confirmation task. Open the Workflow Diagram tab and edit the settings in the Application and Confirmation Human Task’s setting screens.

For all data items, set them to [Editable] for the Application task and [Display only] for the Confirmation task. Finish editing by clicking the [Apply and Close] button.
Input Form Layout Settings
We will change the appearance of the form to make it easier to read. To try it out, click the [Form Preview] button in the upper right of the Data Item tab. The input form that will be generated with the current settings will be displayed. It will work correctly as it is, but changing the order of the items and setting the columns will make the app even easier to use.

First, change the order of the items. You can change the order of the items in the item list on the left side of the Data Items tab by dragging and dropping them. Rearrange them in the following order:
- Title
- Amount
- Start Date
- End Date
- Applicant
- Details

Next, set the Columns. There is a Column setting button on the right side of the data item list.

Set the Columns for Start Date and End Date to 2.


Once you’ve finished it should look like this.
Setting Initial and Input Values
Configure the settings for the values entered in the form. Change the settings for each data item as follows:
Amount
Since this is a business trip application, you must enter an amount. Open the “Amount” settings screen and check the [Required] checkbox.
Also, travel expenses cannot be negative, and you should not be able to submit requests for amounts that are too high. Enter 0 in “Minimum” and 10,000 in “Maximum.” This limits the travel expenses that can be requested to between $0 and $10,000.
To explain this to the user, it is a good idea to include a disclaimer in the explanation text box, such as “The maximum amount is $10,000”.

Start Date/End Date
It’s OK to just make these two items required. Check the [Required] box.


Applicant
Entering the applicant’s name is also required, so check [Required].
In most situations, it is supposed that the person submitting the business trip application is the applicant himself. To make the initial value for “Applicant” the applicant himself, set “Case Start User” as the [Initial Value]. This will mean that the user who started the Case will be entered as the initial value from the start, and so will be the person in charge of processing the applicant swimlane.

Details
Make sure you select multiple lines as the Form Type so that you can easily write long sentences.
You must also enter “Details”.
Then enter the appropriate placeholder text. Placeholder text is text that appears in a light color when nothing is entered in a text box. Input examples are often set, so it would be fine to enter something like “Kyoto – Tokyo $150”, for example.
This text will disappear once you start typing, so be careful not to write important information such as notes.

Check the Form
If the form preview looks like this, the form settings are complete.

Now click “Exit editing” to close the modeller, release Version 3 and check that it works.
Check the App’s Operation
Open the [Start] page from the menu bar in the [Workflow] page and [Start] a new Case for the app you edited. Try pressing the [Finish “Application”] button with various inputs. Are the settings reflected properly?
- Are all fields other than “Title” required?
- Are only numbers between 0 and 10,000 allowed in “Amount”?
- Does the “Applicant” search text box default to the applicant themselves?
- Is there placeholder text displayed in “Details”?
If you click [Finish “Application”] when there is an item that does not meet the conditions, an error message will be displayed in red for that item. If this happens, the data item settings are complete!
chevron_forwardChapter 7: Changing the Workflow Depending on the Situation
chevron_backwardChapter 5: Create an App that Involves Multiple Users

